Key Security Takeaways:
- Do NOT use tx.origin for authorization
- Be careful with using direct mathematical operations
- Be VERY careful when using deletgatecall. You are essentially trusting the functions of the called contract.
- Beware & careful with selfdestruct because all ETH in a selfdestructed contract will be gone forever.
- All the storage is visible on a public blockchain, including the variables declared as private
This post is part 2 of the Ethernaut series. To learn more about the Ethernaut game and the first three levels, head over here. I'm sharing my notes as I go along 😊

In this post, I want to go over challenges 4, 5, 6 & 7 of the Ethernaut Game. Here are the key terms that we will be covering:
- Global variable tx.origin vs. msg.sender
- Arithmetic underflows & overflows (error handling in solidity version 0.8 & above)
- Delegatecall
- selfdestruct
- Storage in Solidity
1. Telephone
Goal: Claim ownership of the contract below to complete this level.
The goal is to become the owner of the given smart contract.
Based on the challenge, the part of the smart contract that we are interested in is the changeOwner(address _owner) function.
  function changeOwner(address _owner) public {
    if (tx.origin != msg.sender) {
      owner = _owner;
    }
Key Concepts
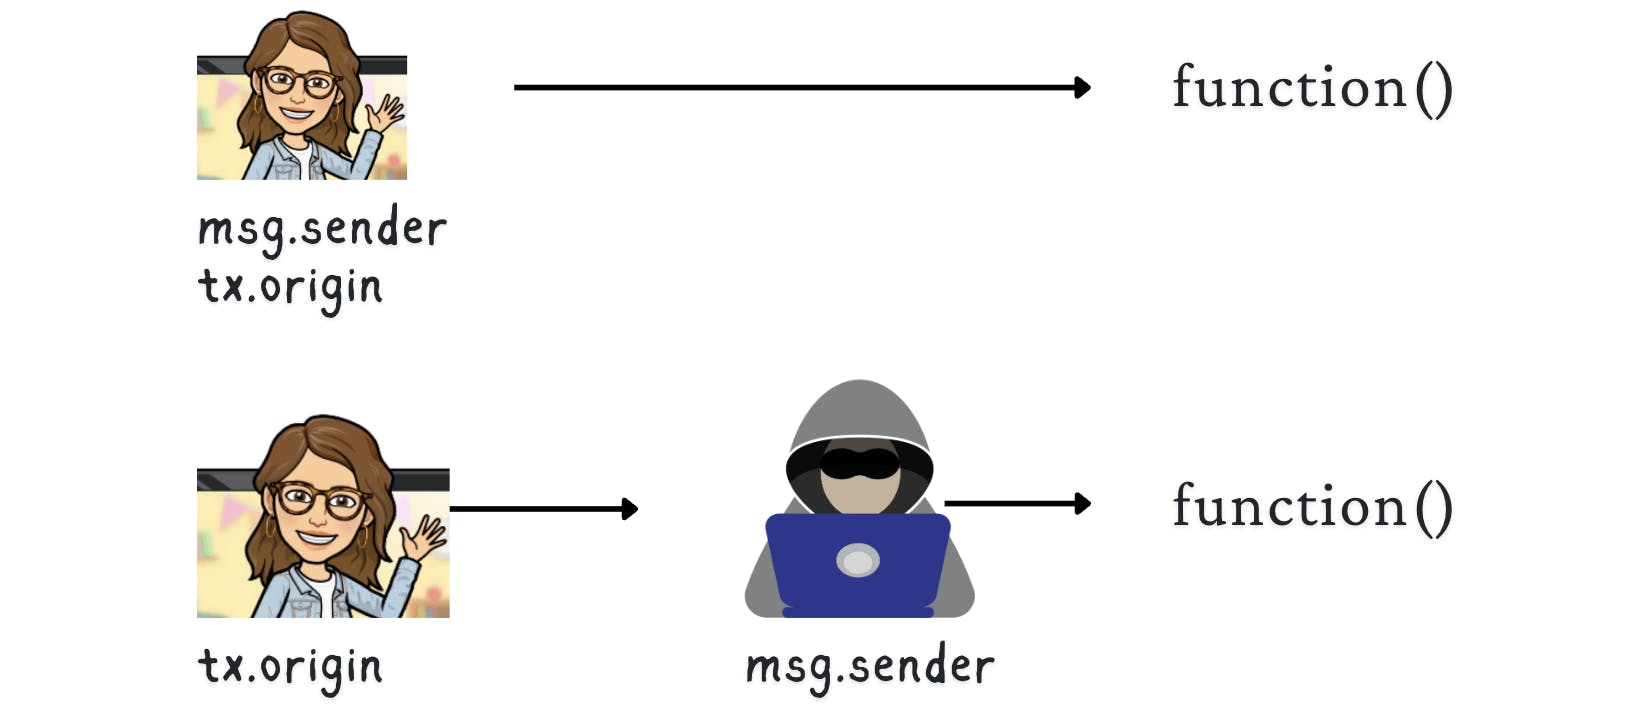
- tx.origin: a global variable that is the starter of the transaction, this must be an externally owned account (EOA) which is a wallet address. Only an EOA can initiate a transaction.
- msg.sender: a global variable that represents the immediate account making the function call (can be a smart contract account or an externally owned account). This can be a smart contract account or an EOA.

- Phishing Attack: is a type of cybersecurity attack in which the attacker disguises as a trustworthy entity and tries to manipulate the user. You may have heard of phishing emails, where malicious actors send emails to trick people into clicking on links.
- Ethereum Transactions: Small note that when a transaction is sent, this can then call another function and start different transactions. (We can have a series of transactions that start from a single user executing one function.) So, for example, you can start a transaction from your wallet, and that can invoke another transaction via a function call on a smart contract and so on. Tx.origin will be your wallet address in this case. Msg.sender will be the immediate account that made the last transaction call.
Basically, the way to win the challenge is to pass the following condition: "tx.origin != msg.sender." To do this, we need an intermediate contract. Let's get to the solution & cover it in detail.
Solution
On the page, right-click & select "Inspect." This will open the google developer console; we'll use this to interact with the contact.
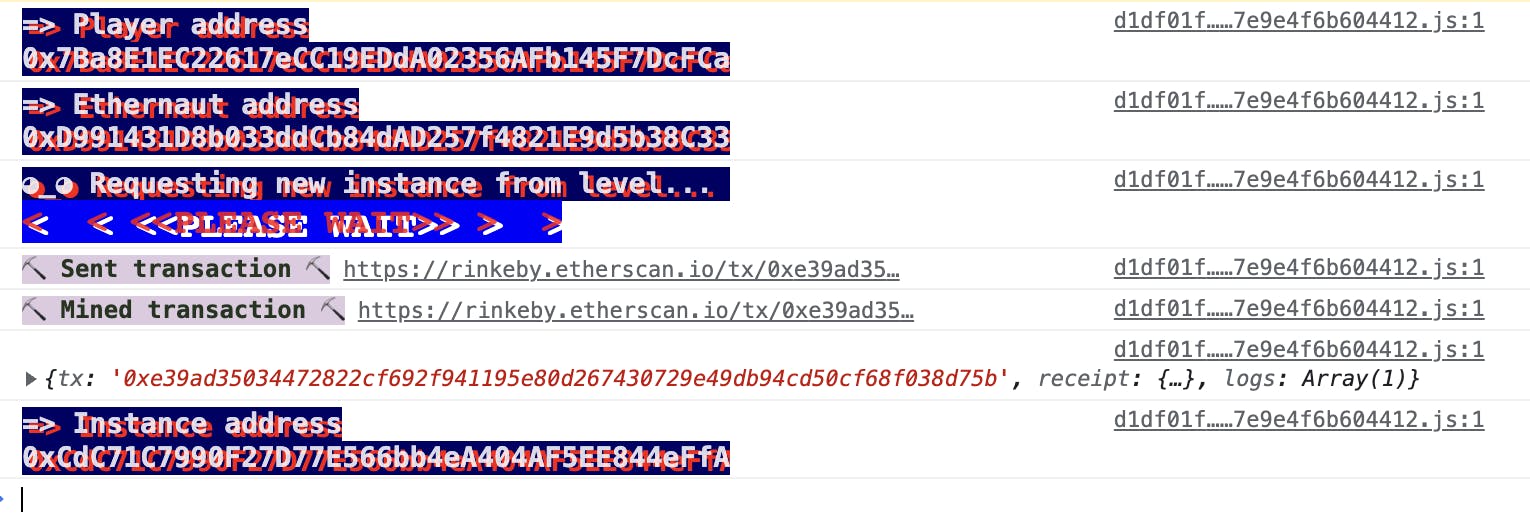
Click "Get a new Instance." Once you click the button, approve the popup on your MetaMask & pay for the transaction.
If all goes well, you should be able to see the smart contract address on the Console.

🥷 How to hack this contract: We need to manipulate who starts the transaction. When we create a new smart contract that sits in between the account starting the transaction, then tx.origin will no longer equal msg.sender. Once this condition is satisfied, the owner can be changed to the address that is passed in the changeOwner function.
We need to deploy a new smart contract. Go to Remix IDE. First, import the Telephone smart contract to remix by copying and pasting the contract and calling it Telephone.sol.
Create a new smart contract called: TelephoneAttack.sol

Here is what the contract should look like:
// SPDX-License-Identifier: MIT
pragma solidity ^0.6.0;
import './Telephone.sol';

contract TelephoneAttack {

Telephone telephoneContract;

constructor(address _address) public {
  telephoneContract = Telephone(_address);
}

function hackContract(address _address) public {
  telephoneContract.changeOwner(_address);
 }
}
It's time to compile the smart contract. On the Solidity compiler tab, click compile to compile the TelephoneAttack contract.

On Remix, change the environment to Injected Metamask. This way, we can deploy the contract from our MetaMask wallet.

Get the TelephoneAttack contract address from Ethernaut.

Time to deploy the smart contract. Add the TelephoneAttack address on the deploy interface and deploy the contract. This way, we will set the attacker contract. Next, you'll need to approve the popup on your MetaMask wallet.

Once the contract is deployed you can view it on the "Deploy & Run Contract" tab.

Call the hackContract function with your wallet address (also called the player address). You will need to approve the popup on your wallet.

You can check the owner from the Ethernaut page from the inspect tab by the following:
await contract.owner()If all goes well, you should be the new owner of the contract! Don't forget to submit your instance to get the completion message from Ethernaut!
🌟 Takeaway
Do NOT use tx.origin for authorization! This makes the smart contract vulnerable to phishing attacks since the attacker can trick someone into starting the transaction. You can read more on the security considerations page over here.
2. Token
Please note: This challenge can probably be deprecated, but it's good knowledge, so I've left it here. It's about arithmetic overflow vulnerabilities, and starting from Solidity versions 0.8, the compiler throws an error for arithmetic overflows/underflows, handling the error. Before the 0.8 version, Solidity would not give an error. Now the compiler automatically solves such errors if you are using version 0.8. or above.
Goal: The goal of this level is for you to hack the basic token contract below. You are given 20 tokens to start with and you will beat the level if you somehow manage to get your hands on any additional tokens. Preferably a very large amount of tokens.
Key Concepts
- Uint: A uint is an unsigned integer in solidity. When you declare an integer as uint it is short for uint256.
- Arithmetic Overflow: calculation that exceeds the memory space. You will not have enough memory space to store the new number, so the number stored will be smaller because it resets the bits. This means that you add 1 to a number, and you will get a smaller number as a result.
- Arithmetic Underflow: The opposite of an overflow. Mathematical operation results in an integer smaller than what can be stored. So you end up with a number larger than the number you started with. For example, you think that when you subtract 1 from 0 you will get a negative number, but you get a larger number as a result.
- SafeMath by OpenZepplin: It's a library for Solidity's arithmetic operations to check for overflows. It's a separate package that you can use in your code.
Solution
On the page, right-click and select "Inspect." This will open the google developer console; we'll use to interact with the contact.
Click "Get a new Instance." Once you click the button, approve the popup on your MetaMask and pay for the transaction.
Once your transaction is mined, you should be able to see the smart contract address on the console.

Check how many tokens you have as a player.
The vulnerability is in the transfer function.
To get more tokens, we need to satisfy the following condition:
require(balances[msg.sender] - _value >= 0);The idea here is that if we give a "_value" that is larger than "balances[msg.sender]" it will be a negative integer and since a uint can not be a negative integer it will be rounded up to a be an unsigned integer.
Currently balances[msg.sender] has 20 tokens. If we give a _value > 20, then the require statement will be satisfied.
The underflow will happen here:
balances[msg.sender] -= _value;We are subtracting a value that doesn't fit and end up with a number that is greater than the start.
Let's use the transfer function to send more tokens than what the player has. To do this, run the following commands from the console:
contract.transfer(any_address, 21) // since it has 20 to start withYou can have any address here. It will add the tokens to this address as well as the "msg.sender" that is the account which you are interacting from the console, aka the player account.
You will need to approve the transaction from your wallet.
Once the transaction is completed, have a look at how many tokens you have.
await contract.balanceOf(player)If all goes well, you should have more tokens than the starting point.
🌟 Takeaway
Be careful with using direct mathematical operations in your code; depending on your solidity compiler version, it may or may not have built-in overflow/underflow checks. Use the safe libraries for arithmetic operations or solidity version > 0.8.
Here's a good follow-up resource on Insecure Arithmetic.
3. Delegation
🤯 Here's a mind-blowing hack that took 150,000 ETH (~30M USD) with the same vulnerability!
Goal: The goal of this level is for you to claim ownership of the instance you are given.
The tip that the game gives is as follows: Usage of delegatecall is particularly risky and has been used as an attack vector on multiple historic hacks.
Key Concepts
- Note that there are two different smart contracts in this challenge. One is called Delegate the other Delegation. Delegation references the Delegate contract.
- Delegatecall: low level function that allows you to call a function on another smart contract while keeping the original data context. You are basically trusting the contract that is being called.
Solution
On the page, right-click and select "Inspect." This will open the google developer console; we'll use to interact with the contact.
Click "Get a new Instance." Once you click the button, approve the popup on your MetaMask and pay for the transaction.
Once your transaction is mined, you should be able to see the smart contract address on the console.

You can check which contract we will be interacting with for the challenge by looking into the ABI of the contract. From there, we can understand the contract we will be using the challenge is the Delegation contract.

Look into who the owner of the contract is:

Let's understand how to solve this section. On the Delegate contract, the "pwn" function allows changing the owner. This is the function that we need to invoke from the Delegation contract from the fallback function on Delegation.
function pwn() public {
  owner = msg.sender;
}
Basically, we will need to call the "pwn()" function as if it was in our Delegation contract with the data in our own contract. We can do this by:
- calling the fallback function on Delegation --> we can call the fallback by calling the pwn() that does not exist in the Delegation contract which will take us to the fallback function
- the fallback() function will call delegatecall(msg.data) --> this will take us to the Delegate contract with our own data
- pwn() --> changes the owner of the Delegation contract to msg.sender
Here's the command to execute on the Ethernaut console:
contract.sendTransaction({data: web3.utils.sha3("pwn()")})We're using the sendTransaction from web3js and will be passing data as an ABI byte string.
You will need to approve the transaction from your wallet. Once the transaction is completed, check the contract owner; if all goes well now, you should be the owner of the contract.
🌟 Takeaway
Be VERY careful when using deletgatecall. You are essentially trusting the functions of the called contract.
4. Force
Goal: Some contracts will simply not take your money ¯(ツ)/¯ The goal of this level is to make the balance of the contract greater than zero.
Key Concepts
- Review of accounts in Ethereum: There are two types of accounts in Ethereum that are Externally Owned Accounts (EOA) and Contract Accounts. These can both receive, hold and send ETH tokens. However, only EOAs can initiate transactions.
- Receive Ether: There are different ways a smart contract can receive ETH, which is via the receive() function, or in the case that it does not exist then the payable fallback() function is also able to receive ETH. There is also another way with "selfdestruct."
A contract without a receive Ether function can receive Ether as a recipient of a coinbase transaction (aka miner block reward) or as a destination of a selfdestruct.
- selfdestruct: is a function in Solidity that is used to delete smart contracts on the blockchain. When it deletes the smart contract, it sends all the Ether to another address.
At this level, we need to send ETH into the smart contract account that does not have any value. We'll be using the selfdestruct function.
Solution
On the page, right-click and select "Inspect." This will open the google developer console.
Click "Get a new Instance." Once you click the button, approve the popup on your MetaMask and pay for the transaction. Once your transaction is mined, you should be able to see the smart contract address on the console.
Go to Remix IDE. On Remix, create a new contract. This contract will selfdestruct & before doing so; it will send all the ETH to our Force contract.
Here is what the contract should look like:
// SPDX-License-Identifier: MIT
pragma solidity ^0.8.17;

contract ForceLevel {

 constructor() payable{
 }

  function attack() public {
      address payable addr = payable(address(_forceContractAddress));
      selfdestruct(addr);
  }

}
You'll need the address of the Force contract which you can get from the Ethernaut pages Inspect tab.
Compile the smart contract from the Solidity compiler tab.
On the Deploy & Run Transactions tab, change the environment to Injected Metamask. Change the value to larger than 0, so our contract has some Ether. Now we can deploy the contract from our MetaMask wallet.
If all goes well, you should be able to see the address of the deployed smart contract.
Run the attack() function with the address of the Force contract.
Once all the transactions are completed & all goes well when you check if the Force contract has got the ETH from Etherscan.
🌟 Takeaway
Beware & careful with selfdestruct because your ETH will be gone forever :-) This also includes the ETH that is sent to the address that is selfdestructed. You can read more on selfdestruct over here.
5. Vault
Goal: Unlock the vault to pass the level!
We can understand the goal of the challenge better when we have a look at the smart contract. The goal is to change the boolean "locked" to false. To do this, we must learn what the private variable "password" is.
Key Concepts
- Storage in Ethereum: when a smart contract gets deployed it gets a certain amount of storage. Storage is split into slots, and the variables on the contract are put into slots. You can use "web3.eth.getStorageAt()" to get the storage at a specific position.
- Private variables: private variables can only be accessed within that contract's code. No other contract code can access these, but we can read them from the blockchain. Blockchains are not for confidential data without extra tools (e.g.: encryption).
Solution
On the Ethernaut page, right-click and select "Inspect." This will open the google developer console; we'll use to interact with the contact.
Click "Get a new Instance." Once you click the button, approve the popup on your MetaMask and pay for the transaction.
Once your transaction is completed, your contract should be created and you'll be able to see the smart contract address on the console.
From the developer tools, you can read some data about the contract:
contract
contract.address
contract.abi
await contract.locked()
"Password" is a private variable declared on the smart contract. We need to access the storage slot of the password variable in the given contract.
We will use the web3.eth.getStorageAt() function. This takes in the contract address and the index position of the storage.
- Call the getStorageAt function at index 0, this will give the locked value.
- Call the getStorageAt function at index 1, this will give the password.
Let's declare a new variable & save the password we get from the storage. This will be encoded in hexadecimal.
var y;
web3.eth.getStorageAt(contract.address, 1, function(err, result){y=result})
The result thats returned will be in hex value.
We need to convert the password from hex to ascii.
web3.utils.toAscii(y)
Time to unlock the smart contract
await contract.locked()
contract.unlock(y)
await contract.locked()
🔓There you go we were able to learn the value of the private variable by accessing the slot it was stored in the storage.
🌟 Takeaway
All the storage is visible on a public blockchain, including the variables declared as private! Don't directly keep confidential data without using additional tools.
To recap, these are my learnings and notes from completing the Ethernaut challenges, and I'm not a smart contract auditor by any means. I think it's useful to learn about the common smart contract vulnerabilities and the Ethernaut challenges are a very fun way to do it! 🙌
If you have any questions or comments, please drop them below or reach out to me on Twitter! 👋
