

Get Started Building Decentralized Applications on Ethereum
Introduction and Guide to Building & Shipping w/Scaffold-Eth


The best way to understand new technology is to get hands-on. Scaffold-Eth enables you to do this for Ethereum.
🏗 Scaffold-Eth is a Decentralized Application(dApp) template to learn and build on Ethereum without the overhead of setting up every piece of the application yourself.
Before trying Scaffold-Eth, I thought it was for people that had experience building on Ethereum, it looked complicated and had a lot going on. Surprisingly, this was not at all the case. It was easy to setup, test and ship. It's the new terminology that makes things sounds complicated. I also must admit that my experiments with Scaffold-Eth were not too crazy. Until last week when we met with Austin Griffith, and had a Scaffold-Eth session. I'm amazed at what we could build in less than an hour. Massive thank you to Austin!!
So let's get to it! This article introduces Scaffold-Eth and guides you through building & shipping a starter Scaffold-Eth application.
Intro to Scaffold-Eth
But first, why?
There are many pieces involved in web3 apps that are all pretty new. The fundamental difference is the new technology stack and having all these new components which weren't there before. This makes it complicated to understand and slow to build applications, especially when you're just starting out. In fact the main question developers ask is: "Where do I even start?"
That's where Scaffold-ETH comes in. It's a quick and simple way to spin up a decentralized application(dApp) without thinking about all the different pieces. You can learn about what and how to build on Ethereum directly by trying things out.
It basically provides a fast-track onboarding for building with Ethereum.
What is Scaffold-Eth?
Scaffold-Eth is a template for building Decentralized Applications(dApp's). It provides rapid prototyping on Ethereum.
Here's a workshop from Austin on Scaffold-Eth.
The main building blocks are:
- The Smart Contract in Solidity
- React Frontend (a user-friendly interface for debugging the smart contract without making any changes to the frontend code)
- Hardhat for running a local network

On the GitHub repo, you'll find the step-by-step guide to getting started.
Alongside the smart contract, frontend and local environment you have the configurations for different networks and the functionality to ship your application. This way you can go from idea to test and then to production very quickly.
Some Features
Here are some features that I'd like to highlight of Scaffold-Eth:
- Debug your Smart Contract UI: When you make changes to your Smart Contract it will automatically show up on the User Interface. This way, you can test and see if the new additions very quickly without making any changes to the frontend code.
- Hardhat Setup: Hardhat is an Ethereum development environment. It allows you to compile, deploy, test, and debug your Ethereum Applications. Scaffold-Eth uses Hardhat and the configurations to spin up a local network are already in the template. With a single command, you're able to spin up a local environment.
- Built-in Wallets (aka Burner Wallets): These are wallets that aren't used in production but are great for development. When you are interacting with the user interface you can use the built-in burner wallet. This way you don't run into all the wallet issues with Metamask. You will also have a local-faucet to get funds.

- Easily switch between different networks: A great part is that the App will handle the network switch by itself. It will say, "Hey, you're on the wrong network".

- ENS name to Address Mapping: Ethereum Name Service(ENS) is a blockchain naming standard. You can get an ENS name and connect it to your Ethereum address. On Scaffold-eth, the mapping functionality is already added. So when you write an ENS name, it will automatically map and show you the Address. It's an extra feature that I really liked. (Checkout the file here.)
Where to get started?
The master branch of Scaffold-ETH is the starter template. There are over 100 branches which are extensions of Scaffold-ETH. Everything is open-source.
Here's how you can get started:
Start learning the basics.
- Learn about the fundamentals of decentralized applications. Make sure to check out Ethereum.org.
- Practice Solidity. With 🏗 Scaffold-eth, you can learn as you're doing.
- Check out Scaffold-eth docs
Take on some challenges.
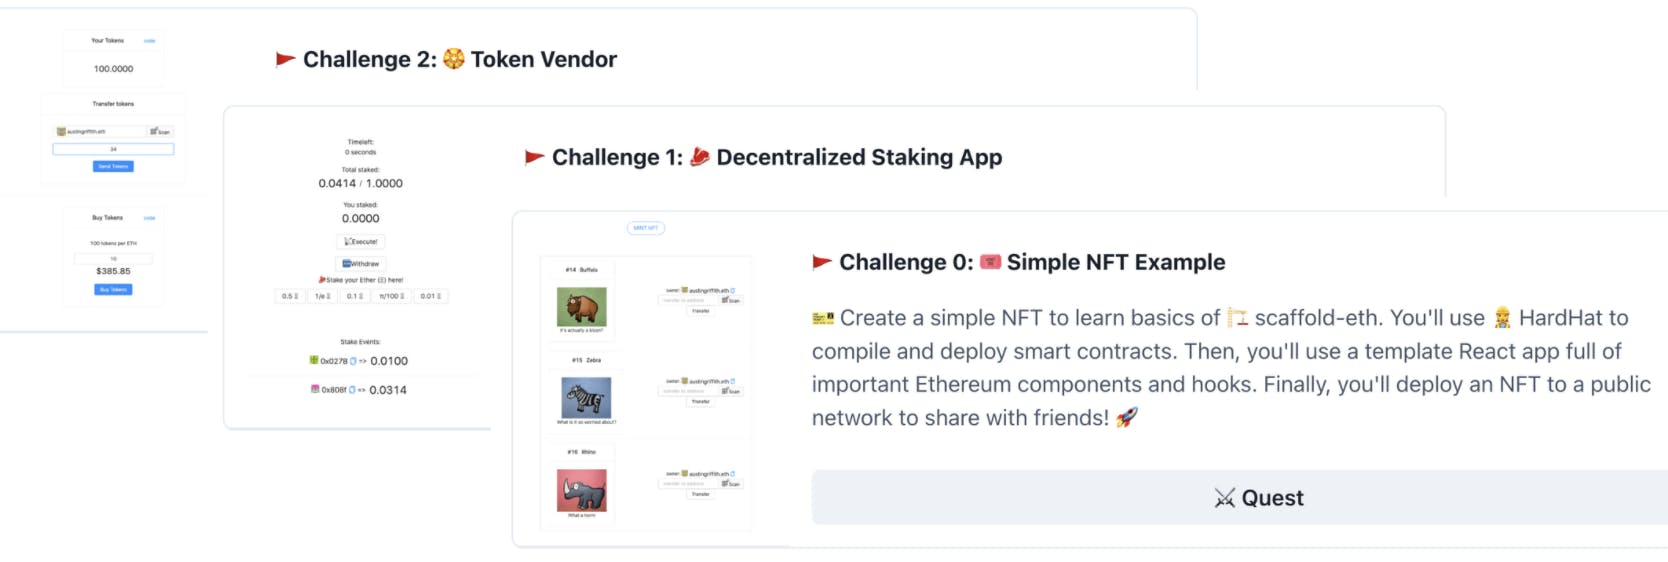
After you've practiced Solidity, you can head over to Speed Run Ethereum to test your knowledge. It has a set of challenges to learn and build dApp's on Ethereum. There are challenges such as creating a Decentralized Staking App, building Multisig Wallet, creating an on-chain NFT. These are important because alongside teaching the syntax, they are created to show what's possible with Ethereum.
 You can also check out other branches on Scaffold-ETH, there's lots of different ideas.
 Go beyond the template.
- Be creative. Use template as a starter, to build your own applications. 👩🎨
- Attend Hackathons! There's lots of Hackathons happening. You can meet other developers, share ideas and build cool stuff. You have the starter template with Scaffold-eth to hit the ground running ⚡️
- 🏰 BuidlGuidl is a group of Ethereum builders learning and building together. There are many builders in the group who are actively maintaining and supporting Scaffold-ETH. You can check out what they're building on Austin's Youtube.

Building with Austin Griffith
I met with Austin to build on Scaffold-Eth. I'm amazed by what we could create in less than an hour!
My previous experience was limited to what's available in the docs and some basic Solidity experiments. With Austin, we created a smart contract with a variable that you can pay to change. The price you need to pay changes based on the time passed from deploying the App. It's like the NFT auctions which go up in price as time passes.
The session with Austin was a wake-up call for me to go beyond the docs, and Scaffold-ETH is a great way to do this. I'd highly encourage anyone to add something of their own; this doesn't have to be something very creative or the next big thing. Start small and iterate 😉
Getting Started with Scaffold-Eth
Here's a step-by-step guide to building with Scaffold-Eth.
Project Tools:
- Node.js
- Yarn
- Git
- Metamask: crypto wallet, this is not needed for testing. We will need it when moving the app to production.
- Alchemy: Alchemy is a blockchain development platform, this is not needed for testing. Needed when moving the app to production.
🏃♀️ Building an Ethereum dApp
Get Scaffold-ETH
git clone https://github.com/scaffold-eth/scaffold-eth.gitInstall the dependencies
cd scaffold-eth
yarn install
You now have the dApp template setup and are ready to get building. The folders we need are in the packages folder:
- Smart Contract —> hardhat/contracts
- Frontend —> react-app/src
- Deployment scripts —> hardhat/deploy
Start a local environment. Please don't close this terminal window; it will spin up a local blockchain environment on your computer. This is what we need to test on localhost.
yarn chainOn a new terminal window deploy the smart contract
yarn deployBy default, the contract will be deployed to localhost. You can change where to deploy the contract to by setting the network parameter: yarn deploy --network polygon
Fyi: You can view you contract ABI after deploying at: —> subgraph/
On another terminal window, start your react-app
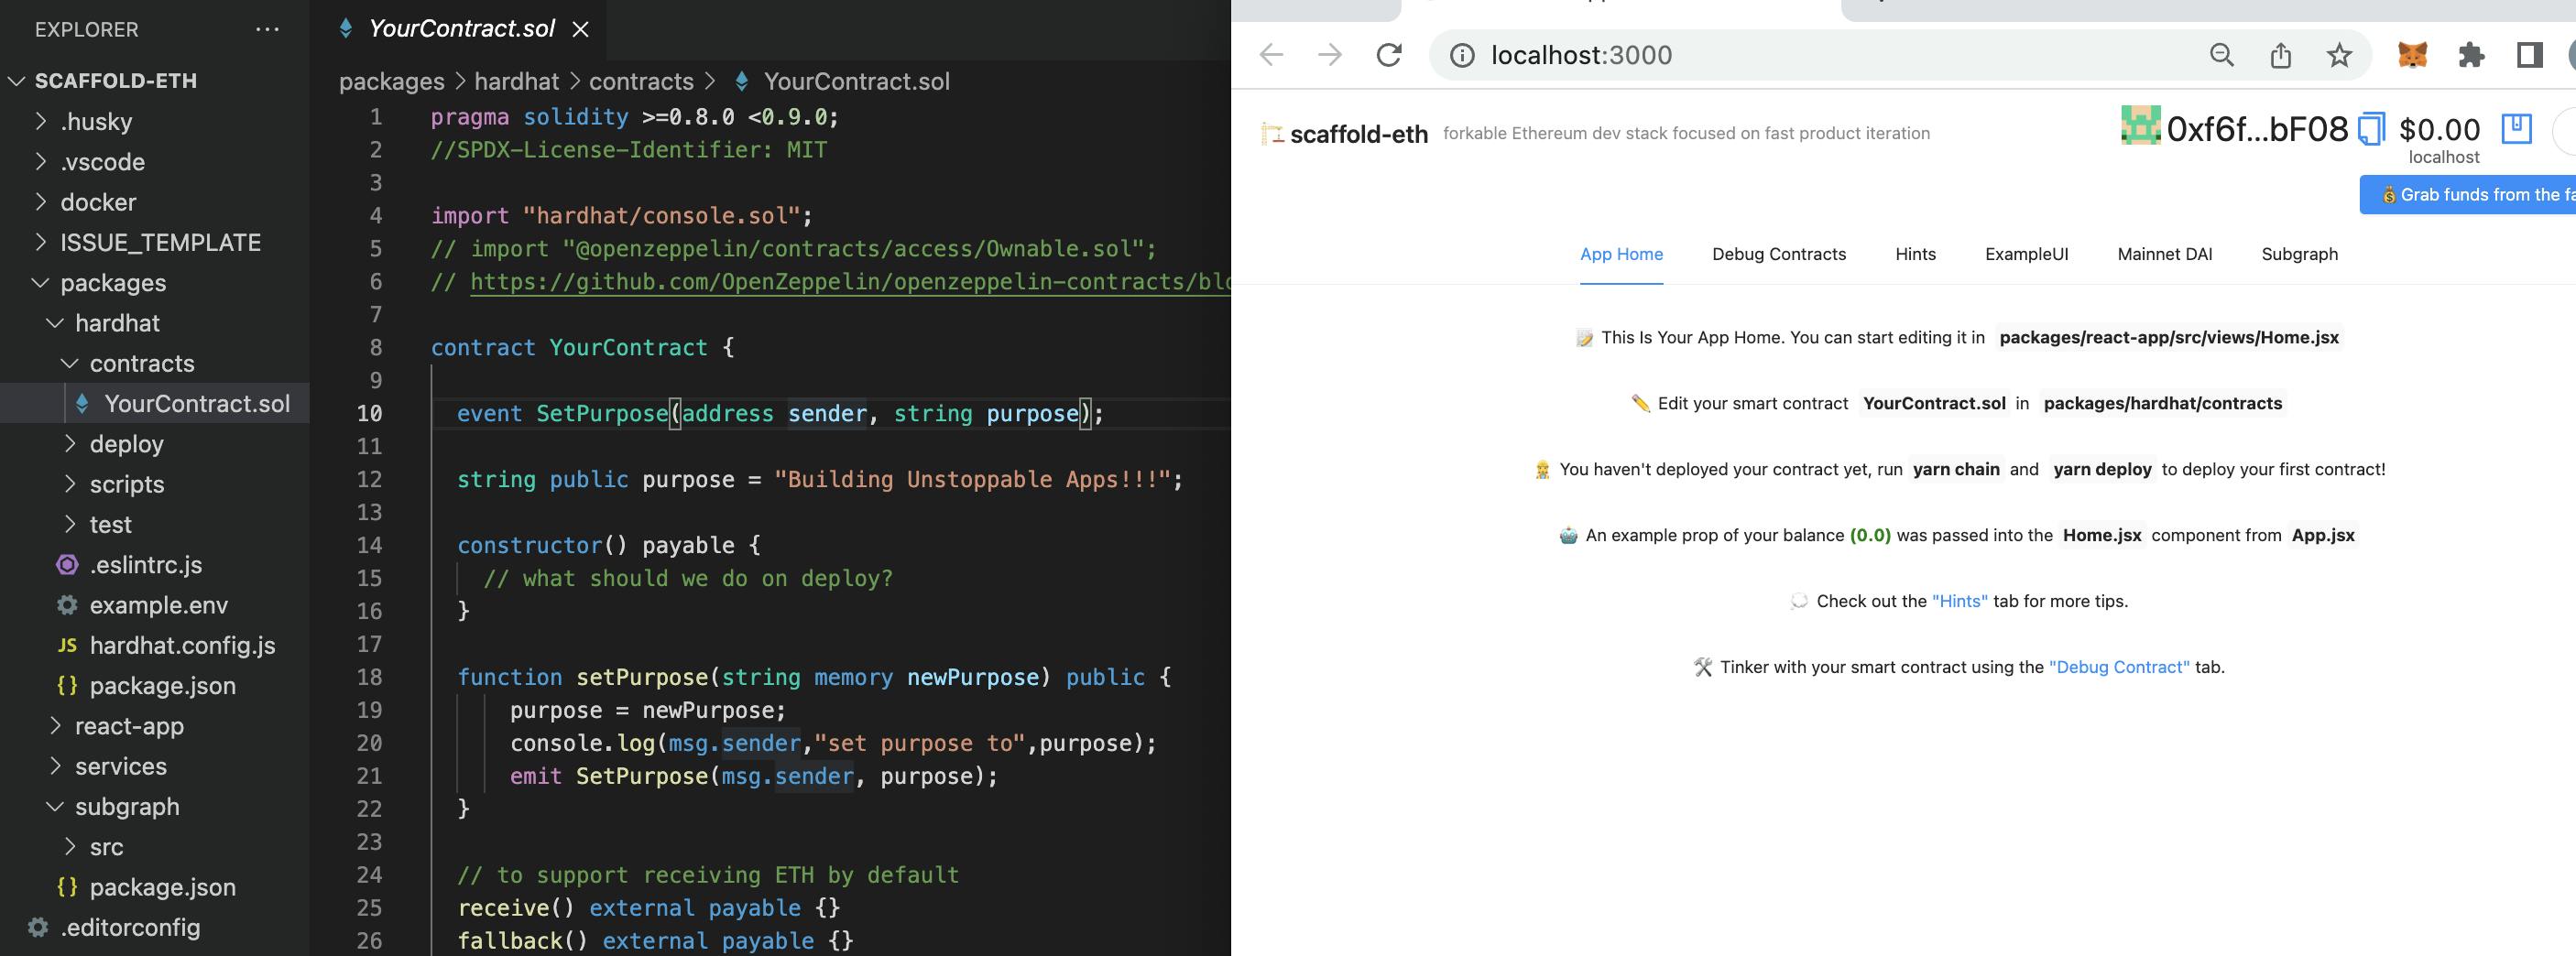
yarn startHead over to localhost:3000 to view and play around with your application.
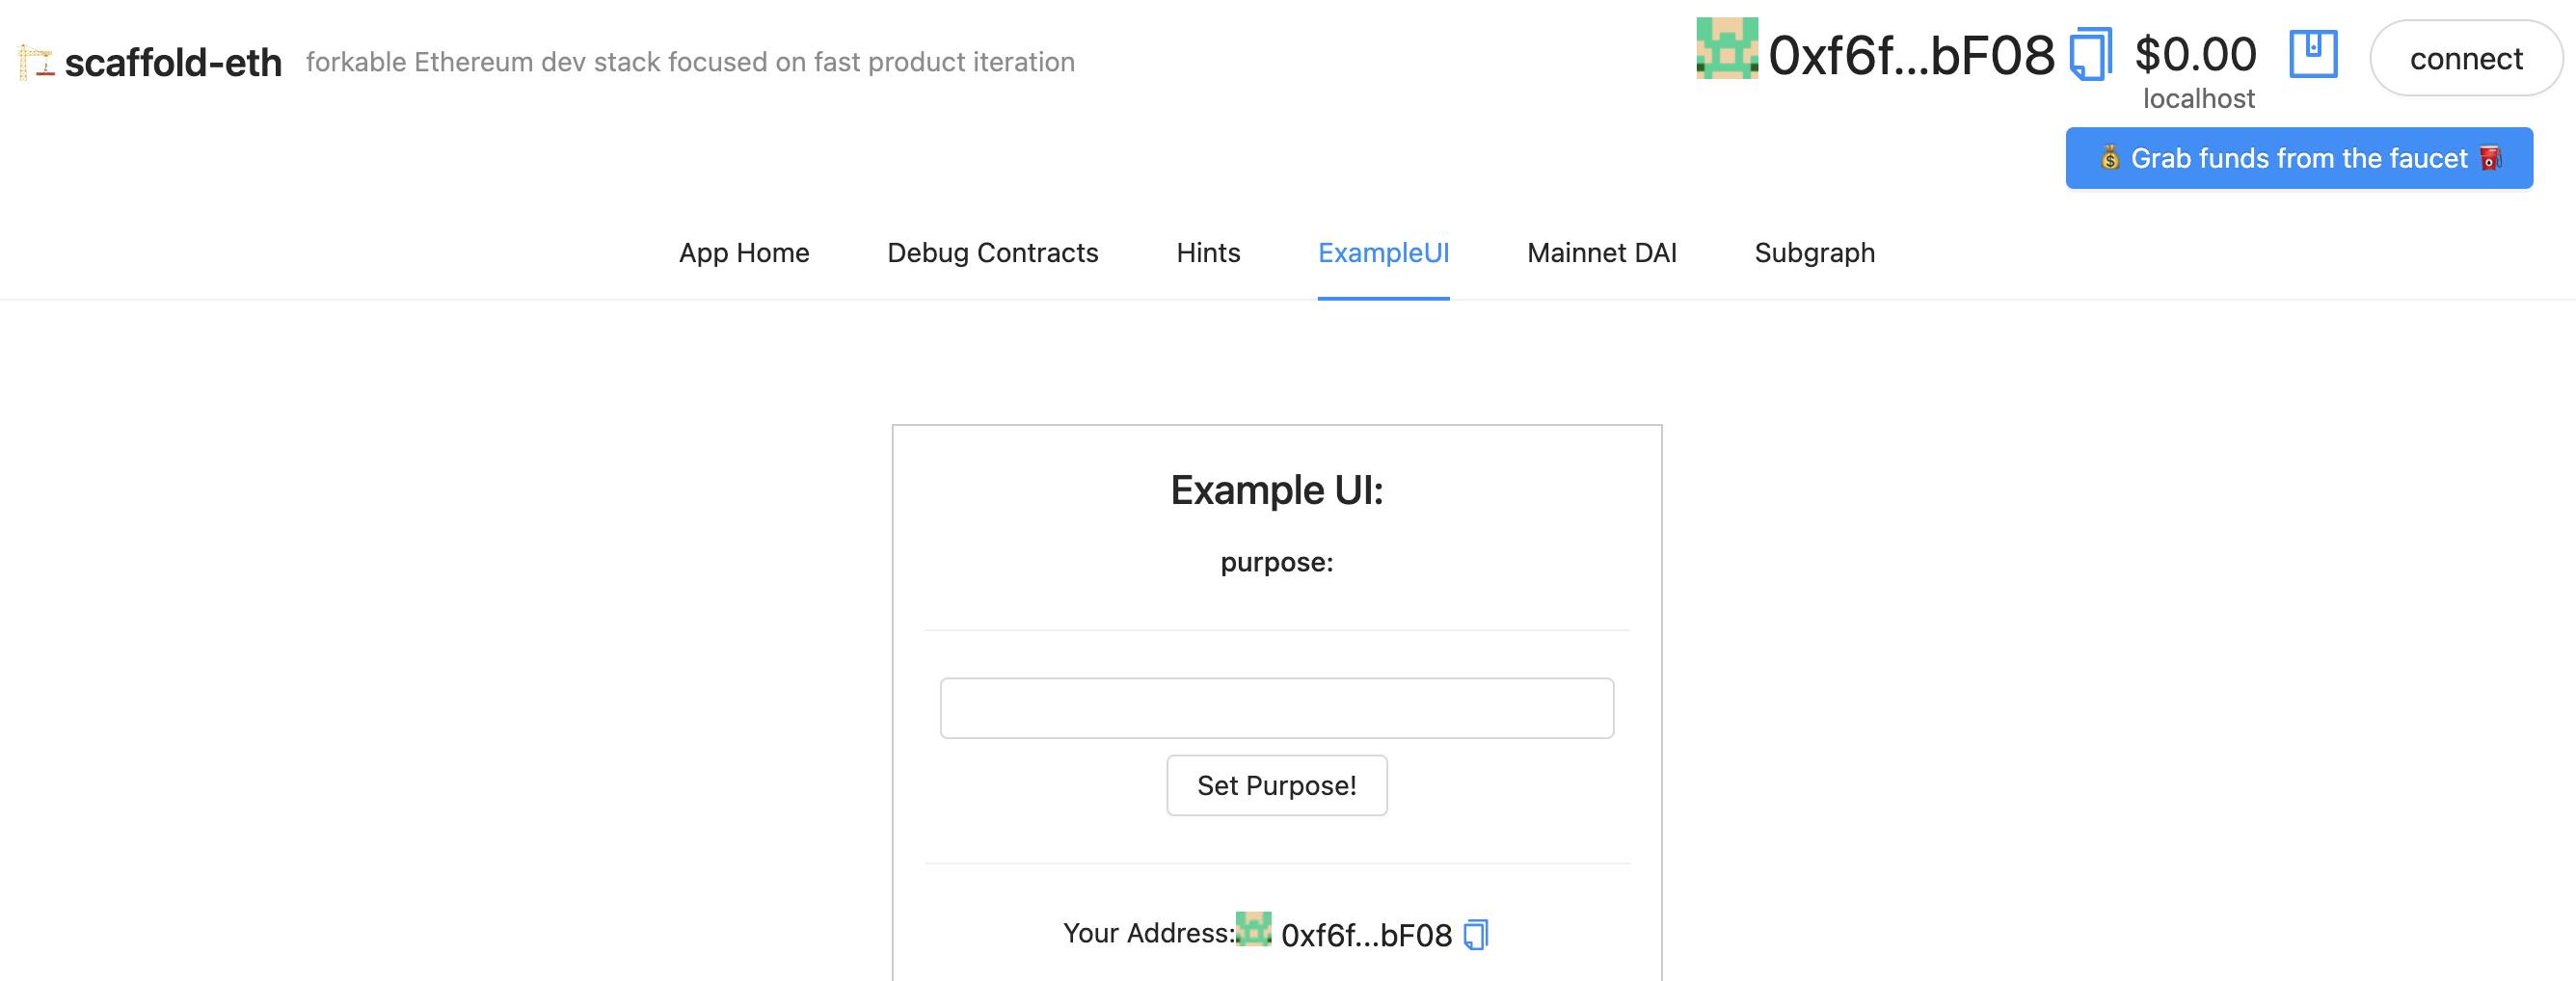 Note: If you are connected to your Metamask or another crypto wallet, logout from it to test the built-in Burner Wallet. It's great for testing because you can move very fast, and will not have the popup's from your Metamask.
Let's briefly look at what we have up & running:
- A local environment
- A Solidity Smart Contract
- A User Interface
You can make changes to your Smart Contract. The smart contract is "YourContract.sol" in packages/hardhat/contracts.
Solidity is the language for the smart contract. Head over to Solidity by Example and the Solidity Docs to learn about Solidity.
For this starter guide I’ll not be modifying the contract. Here are some examples to test out:
- Add new variables: address, booleans, etc.
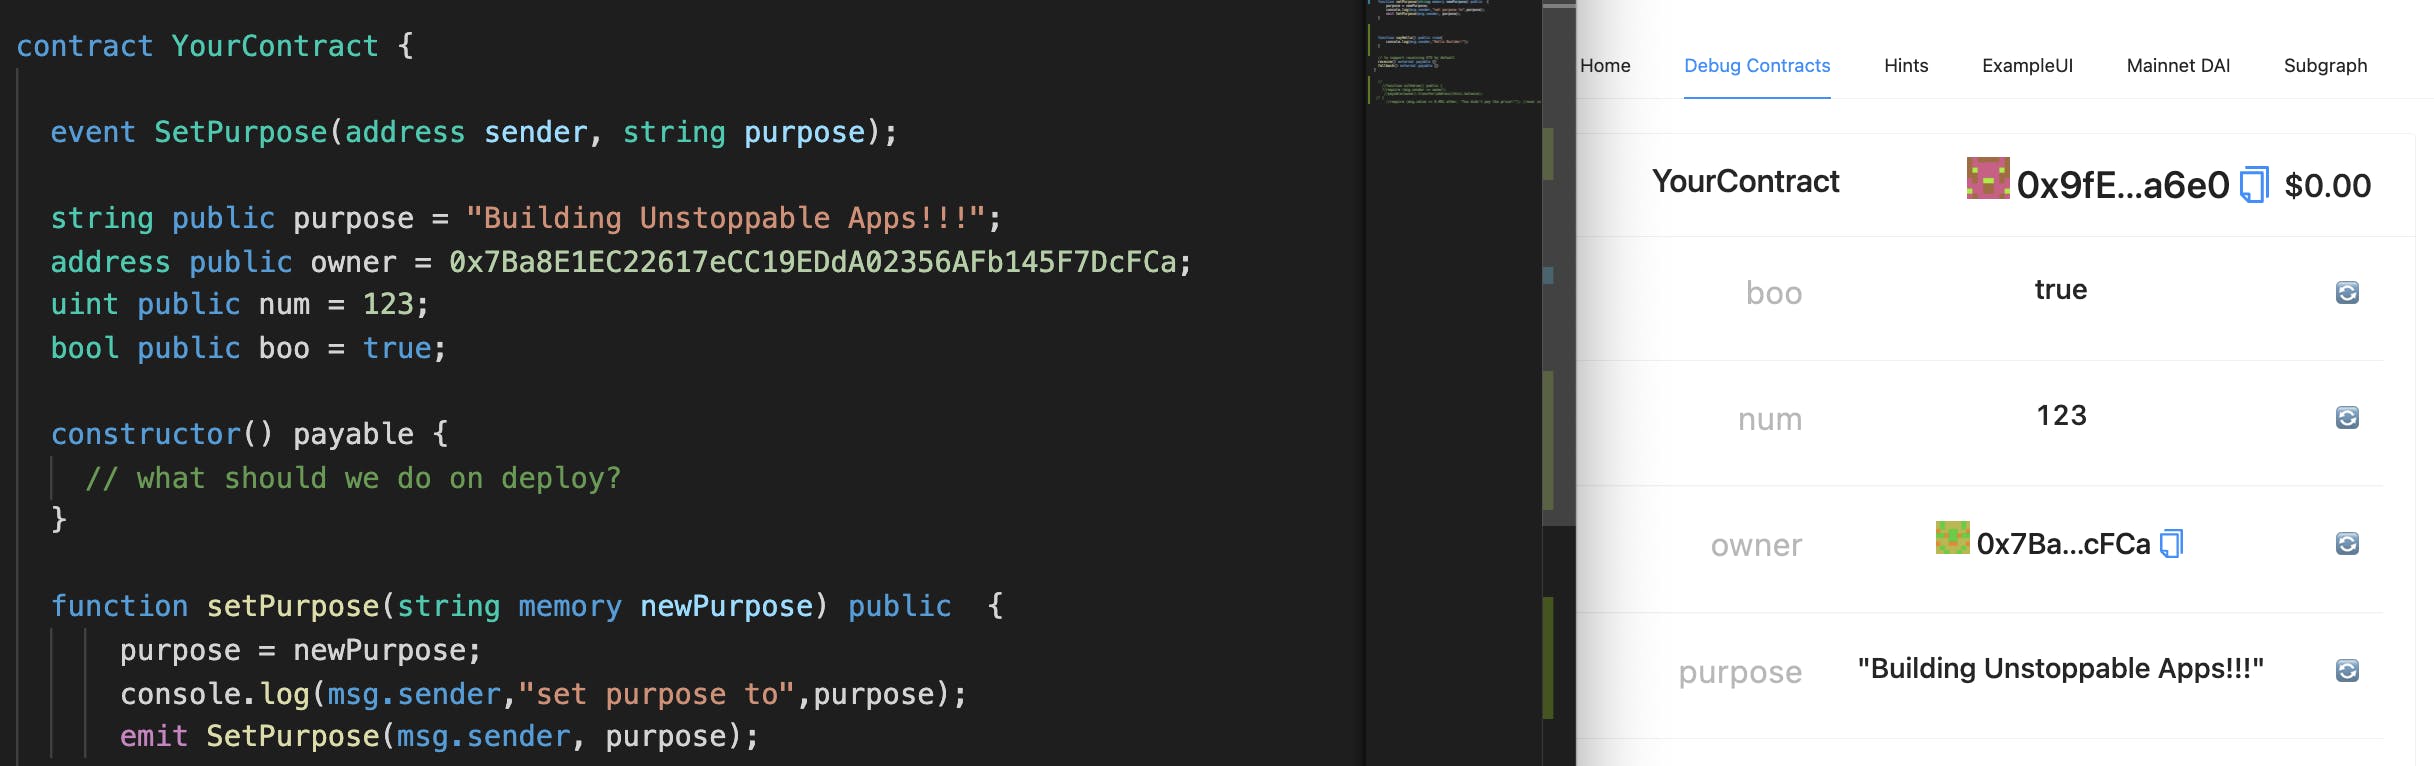
- Make it so that only certain user(s) can interact with the contract

- Add a new function that displays a message
 This is your place to be creative! 👩🎨
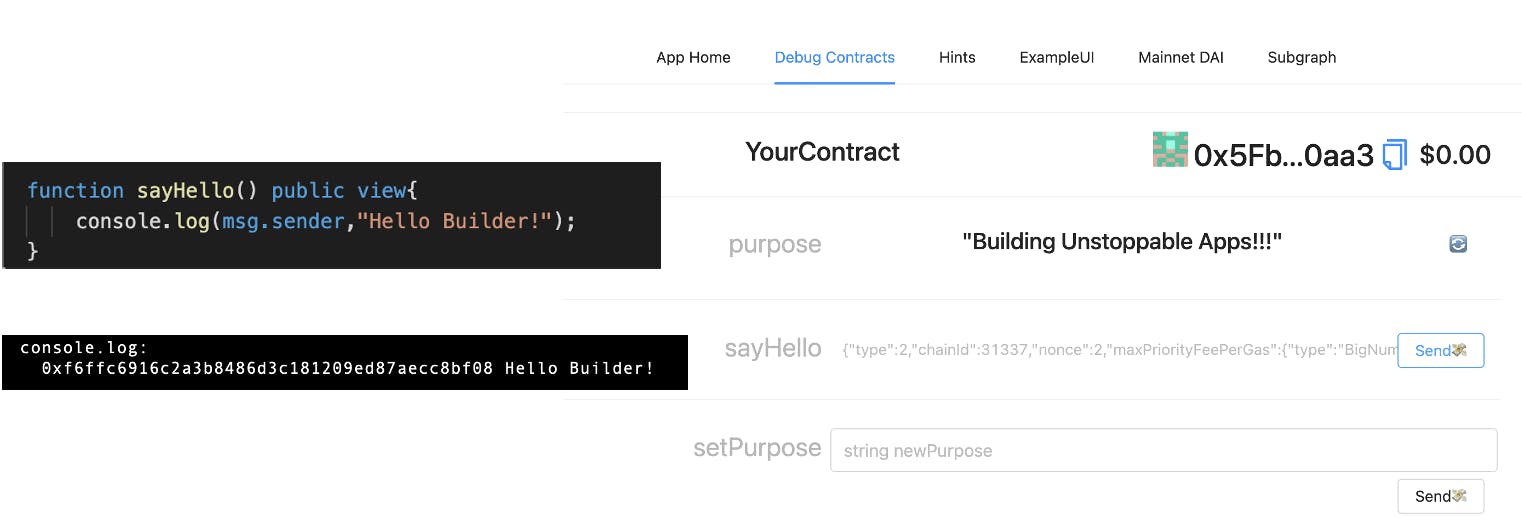
When you make changes to the Smart Contract, you need to re-deploy the Contract. Run the command below:
yarn deployYou can then go localhost:3000 to test your new Smart Contact. The Debug Contract UI page will auto-adapt to reflect the changes. At this stage it's all on your local environment and using burner wallets. This means that everything is free and fast.
- Add new variables: address, booleans, etc.
Once everything is working on your localhost, let's take the Smart Contract and put it on a real network. We'll be using Polygon because of its low cost & fast transactions.
Head over to your Alchemy Dashboard and create an App for Polygon. Get you API key from the Alchemy Dashboard. Rename example.env to .env and add you API key there. This is the file that will store your sensitive credentials.

Feel free to use the network of your choice. If you decide to use a mainnet you will need some funds to pay for the contract creation transaction💰
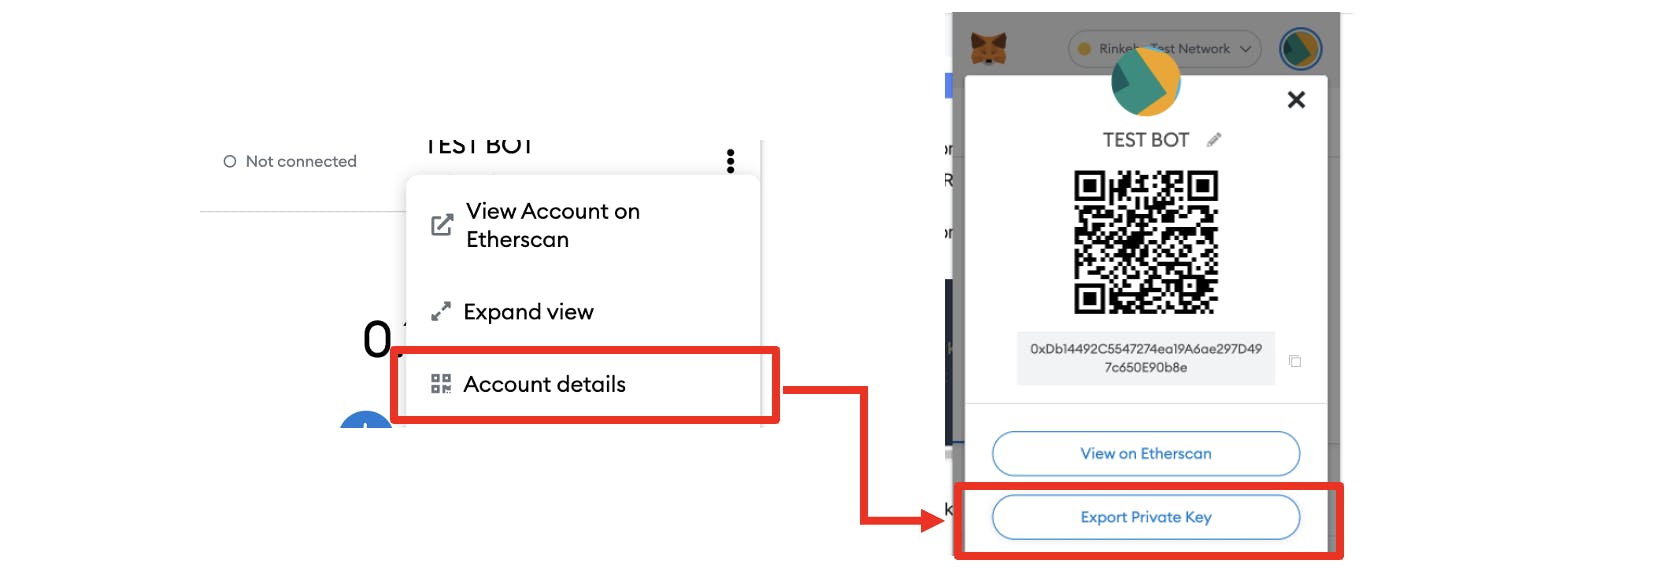
Add your Metamask private key to .env You'll also need some MATIC in that account to pay for the transaction(s). NEVER SHARE YOUR PRIVATE KEY!!
Modify the hardhat/hardhat.config.js to get the Environment variables
 polygon: {
   url: process.env.API_KEY  // get alchemy api key from .env
   accounts: [ process.env.ACCOUNT_KEY, ] // get metamask private from .env
 },
Update the frontend so that it talks to the Polygon network. Head over to App.jsx in packages/react-app/src and change the target network.
const initialNetwork = NETWORKS.polygon; // target frontend networkDeploy the smart contract to Polygon
yarn deploy --network polygonWoohoo! You now have your Contract on a real network! 🚀
Package your frontend.
yarn buildShip your app! You can easily push your frontend to a hosting platform; we'll be using Surge.
Surge is used for static, simple, single-command web publishing. Alternatively, you could use IPFS, Vercel or another web hosting platform.
yarn surgeIt will prompt you to enter a username and password for your surge account. (Fyi: you'll need to click enter once it gives you a website address on the terminal.)
🎉 You'll see the website address pop up on the terminal. This is your live website that talks to your Smart Contract on Polygon!
If you're looking to build decentralized applications Scaffold-eth is a great choice. It gives you an overview of building on Ethereum and the toolset to quickly build & ship. I'll definitely be continuing to learn & build with it.
You can also checkout more tools and resources on Ethereum.org, choose one that fits your style the best and give it a shot.
If you have any questions or comments drop them below or reach out to me from Twitter!